

Detailing your car is one of the most satisfying ways to bring it back to life. It’s a full reset that can improve the look, feel, and even the smell of your vehicle. And while pro-level detailing might seem out of reach, you don’t need a shop or a whole weekend to make a big difference.
Whether you’re sprucing up your daily ride or preparing to sell, this step-by-step guide will walk you through the entire detailing process. From washing and drying to polishing, protecting, and cleaning the interior, you’ll learn how to give your car the attention it deserves—all from home.
Wash Your Car the Right Way
Start the detailing process with a thorough wash. Clearing away loose dirt and grime creates a clean foundation for everything that follows. Begin by rinsing the car with water, focusing on high-build-up areas like the wheel wells, lower panels, and underbody.
Use the two-bucket method: one bucket for soapy water and one for rinsing your wash mitt. That approach helps keep contaminants out of your wash water and reduces the risk of scratches. Work from the top down, section by section, rinsing each area before moving on to keep soap from drying on the surface.
Choose a car-specific shampoo that’s gentle on wax and sealants. Avoid dish soap, which can strip protective coatings. When you finish washing, rinse the car thoroughly and dry it with a clean microfiber towel to prevent water spots from forming.
Clean Your Wheels and Tires
Wheels and tires pick up some of the worst grime on the road, including brake dust, tar, and oil. A good cleaning helps improve appearance and sets the stage for any tire or wheel protection you plan to apply later.
Select a wheel cleaner that is safe for your specific type of rims. Some more potent formulas can damage specific finishes, so be sure to double-check before spraying. Apply the cleaner generously and let it dwell for a few minutes.
Use a soft-bristle wheel brush to loosen grime, working carefully between spokes and around lug nuts. Rinse thoroughly to prevent residue from remaining. For the tires, use an all-purpose cleaner and a dedicated tire brush to remove old dressing and buildup.
After the tires dry completely, apply a water-based dressing to restore a deep black finish without leaving a greasy residue.
Decontaminate Your Paint
Even after a thorough wash, the surface of your car may still feel rough to the touch. That’s a sign of embedded contaminants, such as brake dust, tree sap, or road tar. Claying removes these particles, leaving the surface smooth and ready for polishing.
Use a clay bar or synthetic clay mitt along with a dedicated clay lubricant. Work in small sections, applying light pressure and moving in straight lines. If the clay starts to drag, apply more lubricant and keep working until the paint feels completely smooth.
Claying helps polish and bond wax more effectively, leading to better protection and longer-lasting results. For a deeper dive on technique, check out our guide to using a clay bar.
Polish Your Car (If Needed)
Polishing helps correct minor imperfections like light swirl marks, haze, or oxidation. While it isn’t necessary every time you detail, it can bring back depth and clarity to tired paint.
Use a dual-action polisher with a light cutting pad and a high-quality polish. Work slowly in small sections, allowing the machine to do the majority of the work. For tight areas or minor touch-ups, polishing by hand with a foam applicator is also an option, though it takes more time and effort.
When the polish has broken down and the surface looks glossy, wipe away any residue with a clean microfiber towel.
Step 5: Protect Your Paint
Once the paint is polished, the next step is protection. A layer of wax or sealant helps shield your car from UV rays, bird droppings, road grime, and other environmental hazards.
Carnauba wax delivers a rich, deep shine, while synthetic sealants offer longer-lasting protection. Apply a thin, even layer with a foam applicator, allow it to haze, then buff it off with a clean microfiber towel.
Protecting the paint keeps your car looking better for longer and makes routine cleaning faster and easier.
Clean Your Car’s Glass
Clear windows make a big difference, both in how your car looks and how safely you can drive. Glass is easy to overlook during a detail, but it’s worth the extra attention.
Use a streak-free glass cleaner like Invisible Glass, which is tint-safe, ammonia-free, and leaves no filmy residue behind. Its foaming action clings to vertical surfaces and cuts through dirt, grease, fingerprints, and even pet smudges with ease. Spray the cleaner onto a microfiber towel rather than directly onto the surface to avoid overspray on interior panels. Wipe using a crosshatch pattern—first side to side, then up and down—for even coverage and a streak-free finish.
Vacuum the Interior
Begin by removing any trash or loose items, then vacuum the entire interior, including carpets, seats, floor mats, and hard-to-reach areas. Slide the seats forward and backward to uncover debris that collects underneath.
Use a crevice tool to reach tight spaces between seats and along trim. For vents and other delicate surfaces, switch to a brush attachment to loosen dust without scratching. If your car has rubber mats, remove them, rinse thoroughly, and scrub with an all-purpose cleaner. Dry them thoroughly before returning them to the vehicle.
Clean Upholstery and Carpets
For cloth seats and carpeted areas, use an upholstery cleaner that lifts stains without leaving residue behind. Stoner Car Care Upholstery & Carpet Cleaner uses a foaming formula that clings to fabric, breaks down grime, and wipes away clean.
Spray the foam directly onto the surface, let it dwell for a few moments, then scrub gently with a soft brush. Blot the area with a clean towel to lift dirt and moisture. Tough stains may need a second pass for best results.
For leather interiors, choose a dedicated leather cleaner and conditioner. Avoid using household cleaners, as they can dry out or damage leather over time.
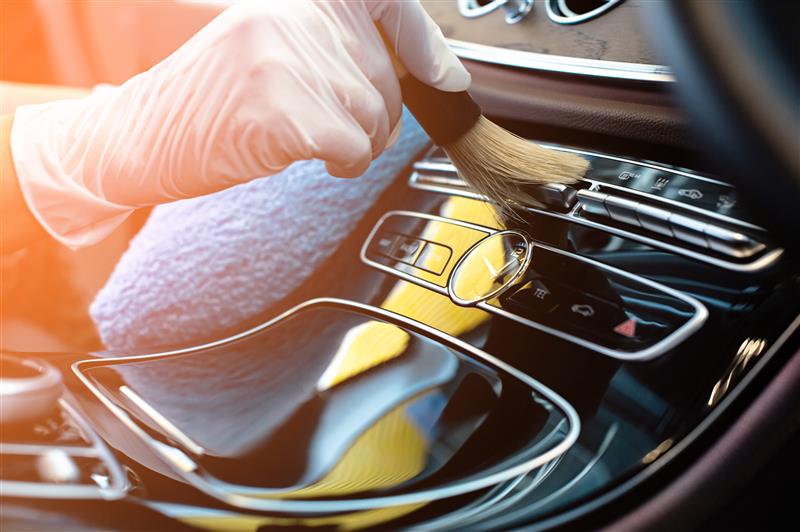
Wipe Down Interior Surfaces
Clean interior surfaces using a dedicated interior cleaner or a mild all-purpose formula. Focus on high-touch areas like the dashboard, center console, and door panels. Use a microfiber towel for most surfaces and a soft brush to reach into textured plastics, seams, and trim.
Skip glossy dressings that leave behind a slick or shiny look. A matte or satin finish creates a cleaner, more natural appearance. For added protection, consider applying a UV protectant to help prevent fading and cracking on plastic and vinyl surfaces.
Finishing Touches That Make a Difference
Wrap up your detail with a few small steps that elevate the overall result:
● Wipe down door jambs using a damp microfiber towel and an all-purpose cleaner.
● Clean and polish exhaust tips to restore their shine.
● Use an air freshener or odor eliminator to give the cabin a clean, pleasant scent.
These final touches may seem minor, but they play a big role in making your car feel truly refreshed.
Ready to Get Started?
Detailing your car at home isn’t just about how it looks. It’s about protecting your investment, enjoying a cleaner ride, and taking pride in the care you put into it. With the proper steps, you can get professional-level results without ever leaving your driveway.
Products like Invisible Glass and Stoner Car Care Upholstery & Carpet Cleaner make the job easier and more effective. They’re simple to use, leave no residue, and help deliver that just-detailed feel.
Set aside a few hours, follow each step, and take your time. Your car will look better and you’ll enjoy every mile!