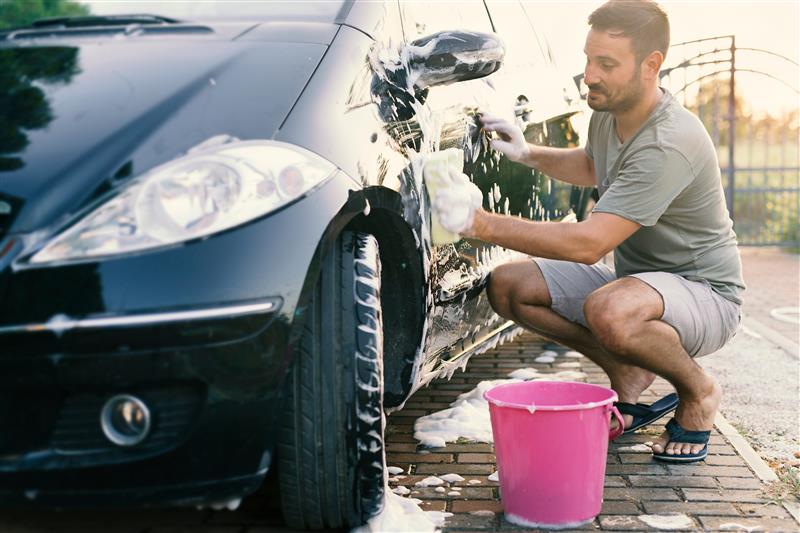
There’s nothing like a freshly washed car—clean paint, clear glass, and that deep shine that turns heads on the road. But getting it right takes more than soap and a garden hose. Wash the wrong way, and you can leave behind swirl marks, scratches, and water spots. Do it right, and you’ll protect your paint, extend the life of your finish, and keep your car looking great.
Whether you're new to detailing or just want to tighten up your routine, this guide walks through the 10 steps to a proper car wash.
Step 1 – What You Need to Wash Your Car the Right Way
Start with the right setup. Having everything in place keeps the process efficient and helps avoid mistakes like using the wrong towel or contaminating your mitt.
Essential Supplies
|
Tool |
Why It Matters |
|---|---|
|
Two buckets |
One for soapy water, one for rinse—avoids scratching paint |
|
pH-balanced car wash soap |
Designed for clear coat; won’t strip wax or damage paint |
|
Microfiber wash mitt or sponge |
Gentle on paint and effective at lifting dirt |
|
Wheel cleaner and brush |
Removes brake dust and grime without harsh scrubbing |
|
Microfiber drying towels |
Prevents water spots and marring during drying |
|
Glass cleaner |
Leaves windows and mirrors streak-free |
|
Tire dressing |
Gives tires that deep black, just-detailed look |
Optional but Helpful Tools
● Foam cannon for extra suds
● Spray wax or Speed Bead Quick Detailer.
● Grit guard inserts to reduce debris in your rinse bucket
Step 2 – Choose a Shady Spot to Prevent Water Spots
Sunlight heats your car’s surface fast, causing soap and water to dry too quickly. That can leave behind streaks, spots, and residue.
Tips for Spot-Free Washing
✔ Choose early morning or late afternoon to wash, when the panels are cool.
✔ Work in sections and rinse each one before the soap dries.
✔ Never wash under direct midday sun unless fully shaded.
Washing at the proper temperature can make the difference between a glossy finish and a streaky mess.
Why Washing in the Sun Causes Problems
|
Sunlight-Caused Problem |
Result |
|---|---|
|
Soap dries before rinsing |
Leaves behind film or streaks |
|
Water evaporates too quickly |
Creates hard water spots |
|
Warm panels |
Makes it harder to clean evenly |
Step 3 – Rinse Thoroughly Before You Wash
Rinse your car completely to remove loose dirt, sand, and dust. Skipping this step can lead to scratches when washing.
How to Rinse Right
● Use a hose with gentle pressure.
● A pressure washer (under 2000 PSI) works well, especially with a foam cannon.
● Start at the roof and rinse downward.
A thorough rinse sets you up for a smoother, safer wash.
Step 4 – Clean the Wheels and Tires First
Your wheels collect the most grime, brake dust, and road debris. Always clean them before you wash the paint.
Wheel Cleaning Steps
- Spray on a professional-strength wheel cleaner and let it sit for the recommended amount of time.
- Use a stiff-bristle wheel brush to agitate grime.
- Rinse thoroughly, including the tire sidewalls.
Step 5 – Use the Two-Bucket Method for a Scratch-Free Wash
If there’s one technique that makes the biggest difference in protecting your paint, it’s this one. The two-bucket method separates clean, soapy water from dirty rinse water, so you’re not dragging grit back across your paint.
Here’s how it works:
● Fill one bucket with soapy water
● Fill a second bucket with clean water to rinse your wash mitt
● After each pass, rinse the mitt before dipping it back into the soap.
The two-bucket wash method helps prevent swirl marks and micro-scratches.
Best Practices for Two-Bucket Washing
● Start at the top. Work your way down—the lower panels are always the dirtiest.
● Use straight lines. Skip the circular scrubbing to avoid swirl patterns.
● Rinse your mitt often. Dip into the rinse bucket frequently to flush out debris.
● Want more foam? Pair your setup with a foam cannon and MOAB Foaming Car Wash for a thick, clingy lather that lifts dirt and rinses clean.
MOAB's high-lubricity formula works just as well in a bucket as it does in a foam cannon, making it a go-to for weekend washes or full-detail days.
Want to go deeper on safe washing techniques? Check out our complete guide to a scratch-free car wash for step-by-step tips that protect your finish every time.
Step 6 – Rinse Again Before You Dry
Once the car is fully washed, give it a final rinse from top to bottom. This removes any remaining suds and prevents streaks or soap residue.
Working in warm weather?
Rinse one panel at a time to keep water from drying on the surface before you get to it.
A clean rinse sets the stage for an easier dry and a better finish.
Step 7 – Dry with Microfiber Towels or a Blower
Air drying leads to water spots that can etch into your paint. Always dry your car completely using safe, paint-friendly tools.
Drying Best Practices
● Use plush microfiber towels and blot—don’t drag
● Work in straight lines, flipping to a dry section as you go
● Use a car-safe air blower for mirrors, badges, and tight spaces
Want to lock in your work? Follow up with a light mist of Speed Bead Quick Detailer while drying. It boosts shine, adds hydrophobic protection, and makes your next wash even easier.
Step 8 – Clean the Glass and Mirrors
Glass is the first thing you notice when the sun hits your car. Even if the paint is spotless, streaks on the windows or mirrors can ruin the overall look. Clean, streak-free glass gives your detail a finished, high-quality appearance.
How to Get a Streak-Free Finish
● Spray your glass cleaner directly onto a clean microfiber towel, not the glass. This avoids overspray on paint or trim.
● Wipe using overlapping horizontal or vertical passes for full coverage.
● Flip the towel to the dry side and go over the surface again to eliminate streaks.
Avoid household glass cleaners—they often contain ammonia or surfactants that can damage tint or leave behind a greasy film. Use a professional product. We recommend Invisible Glass’s dye- and ammonia-free formula for a streak-free shine.
Step 9 – Apply Tire and Trim Dressing
Tires and trim are easy to overlook, but they’re the finishing touches that take your wash from clean to fully detailed. They also help protect rubber and plastic from UV damage, fading, and drying out.
Once the surfaces are clean and dry, apply a dressing to restore color and add subtle gloss.
Tire Trim Application Tips for a Pro-Level Finish
● Always apply to dry surfaces for best results
● Spray-on formulas offer fast coverage with less mess
More Shine Tire Finish is an ideal option here. It delivers a smooth, deep-black finish without streaks, sling, or greasy residue, and does not require wiping.
A well-dressed sidewall and darkened trim add contrast and give your car a clean, finished look that lasts.
Step 10 – (Optional) Add Wax or Sealant for Lasting Protection
This step is optional, but if you want longer-lasting protection and a deeper finish, adding a wax or sealant is worth it. A good topcoat shields your paint from UV rays, road grime, and water spots—and helps water bead and roll off during future washes.
|
Product Type |
Why Use It |
|---|---|
|
Spray Wax or Speed Bead |
Fast and easy to apply; boosts gloss and adds light protection in minutes |
|
Paste Wax or Ceramic Spray |
Offers deeper shine and longer-lasting protection; better for seasonal or show-ready detailing |
Apply wax or sealant in the shade, one panel at a time, and always use clean microfiber towels for both application and buffing.
Recap – The 10 Steps to a Proper Wash
A proper wash isn’t about rushing through a rinse and calling it done. Each step builds on the last to protect your paint, prevent swirls, and deliver that just-detailed look.
Here’s a quick breakdown of what a complete wash should include:
|
Step |
What to Do (and Why) |
|---|---|
|
1 |
Gather your gear to prepare: two buckets, wash mitt, microfiber towels, and MOAB. |
|
2 |
Park in the shade to prevent soap and water from drying too quickly. |
|
3 |
Before you begin to wash, rinse thoroughly to prevent scratches. |
|
4 |
Clean wheels and tires first to avoid splashing dirt onto clean panels. |
|
5 |
Wash using the two-bucket method to reduce swirl marks. |
|
6 |
Rinse again, section by section if needed, to ensure all soap is off the vehicle. |
|
7 |
Dry with microfiber towels or a blower to avoid water spots. |
|
8 |
Clean glass and mirrors with a tint-safe automotive glass cleaner for a finishing touch. |
|
9 |
Dress tires and trim for a dark, clean finish. |
|
10 |
|
Complete these steps, and you’ll cut down on mistakes, keep your finish protected, and make every wash more rewarding.
Final Thoughts – Clean, Protect, Repeat
Washing your car the right way preserves the finish, protects your investment, and makes every future wash easier.
Stick to a consistent routine. Use the right tools. And lean on proven products like MOAB, More Shine, and Speed Bead to get professional-level results right in your driveway. Clean glass. Deep gloss. No swirls. That’s how you keep your car looking its best—every time you drive


